How it works
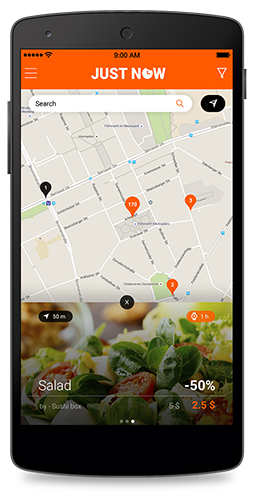
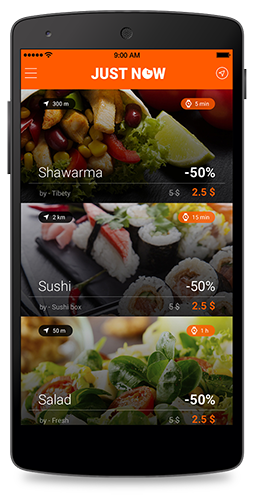
Offer Map
This is the application home screen. Clients can:
- Navigate through the existing offers
- Select offers and view offer details
- Go to their location and find available offers
- Search for a specific offer
- Filter offers
- Select navigation menu
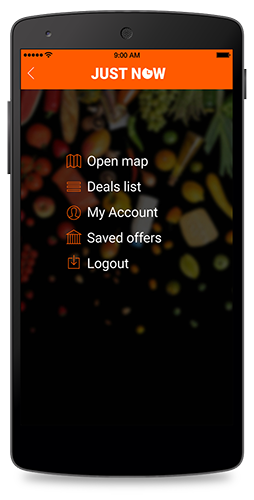
Navigation
Clients can navigate through the application menu by selecting menu categories.
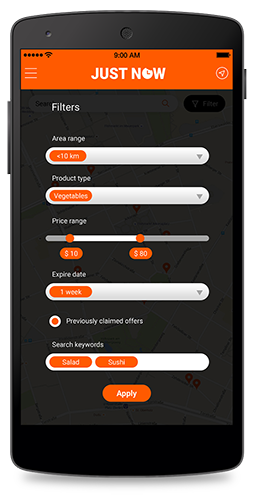
Filtering
Filter views is useful when clients want to narrow their offer search by applying filters.
Offer List
Clients can see all offers both on a map but also as a list. List offers will be displayed in an ascending order, depending on the promotion expiration date. This way clients will not miss any offers.

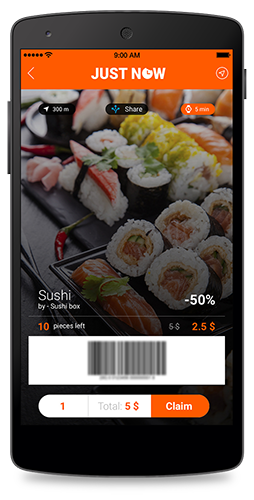
Offer
Clients can select offers from the offers list. When an offer is selected clients can:
- View offer details
- Claim the offer
- Share the offer with their family and friends.
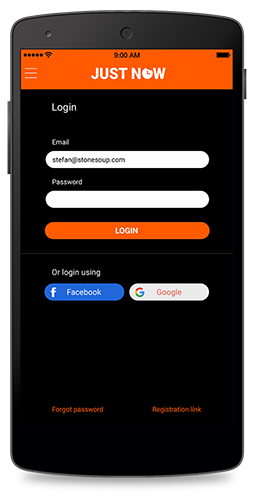
Authentication
In order to claim offers, clients are asked to authenticate into the application by using Facebook, Google+ or email credentials.
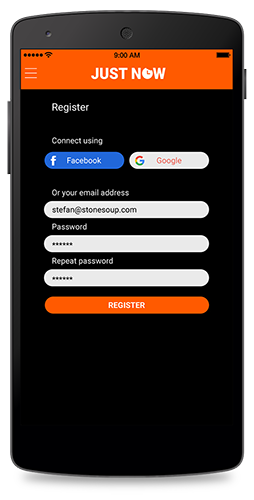
Registration
Clients who are claiming offers for the first time into the application will be asked to register by using Facebook, Google+ or email credentials.
Claimed Offers List
All offers claimed are displayed in a list. Clients can:
- Browse claimed offer list
- Select a specific claimed offer
Claimed Offer
After selecting a specific claimed offer, clients can present the barcode to the cashier and benefit from the discounted offer.

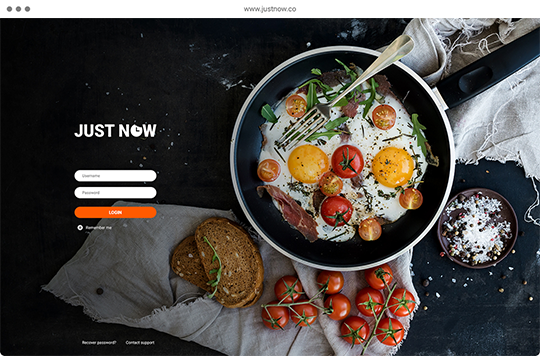
Authentication
Authenticate with your company administrator account.
Account management
Account details in one place.
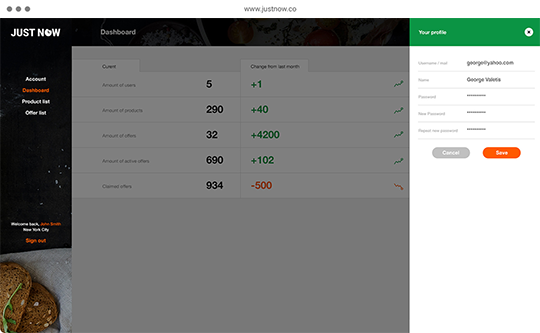
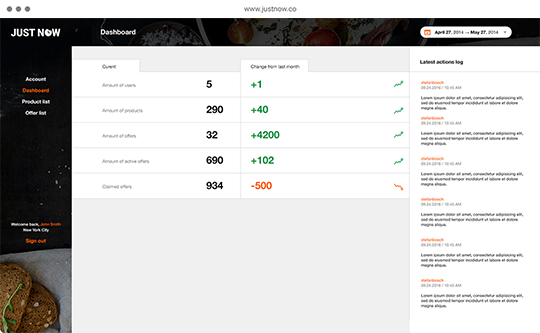
Dashboard overview
Check your promotions and new clients evolution.
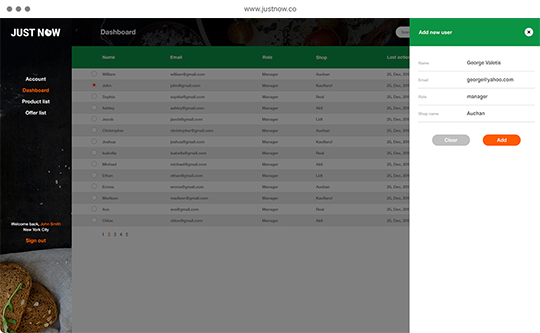
User management
Manage your employees. Add new users and update information whenever is necessary.
Product management
Edit product information in order to keep you product database updated.
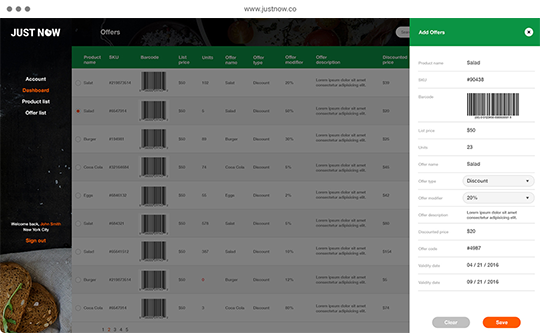
Offer management
Create offers for your store products. Select the validity periods and start selling.
Navigation
Merchandisers can navigate through the application menu by selecting menu categories.
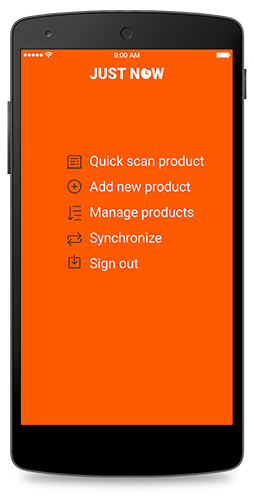
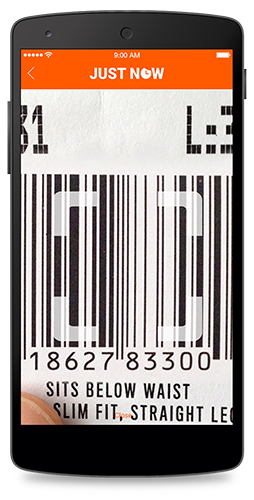
Product scan and search
Choose scan product option from the menu. A product scanner will be displayed. Merchandisers will scan the product barcode and all product details will be displayed.
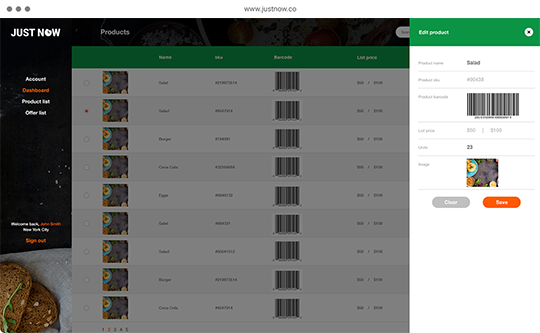
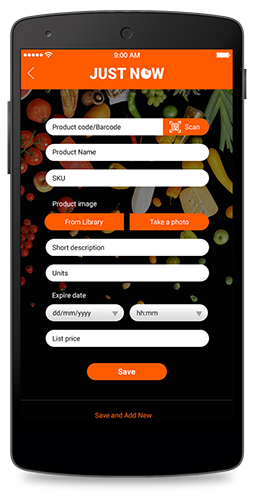
Product management
Product screen offers useful information about the products. Merchandisers can:
- Edit information
- Scan barcode (in case the existing one is incorrect)
- Take photos of the products or upload existing ones directly from the tablet/smartphone.
- Save information
- Save information and add a new product
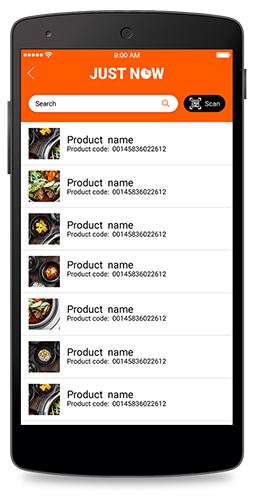
Products navigation
This application screen shows a list of all products available in the application. Merchandisers can:
- Browsers through the list
- Search for a specific product
- Scan products
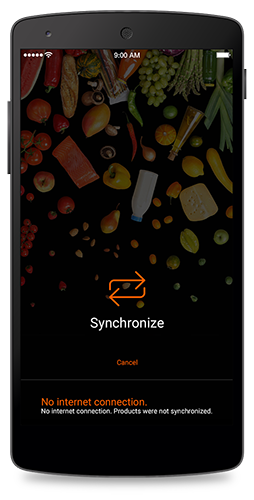
Synchronization
Synchronize option will synchronize products available in application database. Merchandisers will select synchronize option before they start to add new or update products.
Authentication
Before starting, merchandisers must log into the application. Merchandisers will obtain application credentials from their shop managers.